Makita LS1013 User Manual: A Comprehensive Guide
This manual provides detailed instructions for the Makita LS1013 sliding compound miter saw, covering safety, operation, maintenance, and troubleshooting based on user discussions.
Common issues, like blinking red/green lights on chargers, and comparisons to DeWalt, Bosch, and other Makita models are also addressed within this guide.
The Makita LS1013 is a popular 10-inch sliding compound miter saw, renowned for its precision, power, and versatility. This manual serves as a comprehensive resource for both novice and experienced users, ensuring safe and efficient operation. Discussions online highlight its suitability for a wide range of projects, from simple home improvements to more complex carpentry tasks.
Understanding the LS1013’s capabilities is crucial for achieving optimal results. It features a sliding rail system for increased cutting capacity, a bevel adjustment for angled cuts, and a miter adjustment for crosscuts. Users frequently compare it to alternatives from brands like Bosch and DeWalt, often citing Makita’s build quality and reliability. This guide will delve into each feature, providing step-by-step instructions and troubleshooting tips gleaned from user experiences and common issues, such as charger light indicators.
Proper usage and maintenance, as detailed herein, will maximize the saw’s lifespan and performance.
Safety Precautions
Prioritizing safety is paramount when operating the Makita LS1013. Always wear approved safety glasses or a face shield to protect against flying debris. Hearing protection is also recommended due to the saw’s high noise level. Ensure the work area is well-lit and free of obstructions. Never operate the saw when fatigued or under the influence of drugs or alcohol.
Before each use, inspect the blade for sharpness and damage. A dull or damaged blade increases the risk of kickback. Always disconnect the power supply before making any adjustments or changing the blade. Keep hands clear of the blade path during operation. Be mindful of the cord placement to avoid accidental cuts. Discussions online emphasize the importance of understanding the saw’s locking mechanisms and emergency stop features.
Follow all instructions in this manual and adhere to local safety regulations.
Package Contents
Upon receiving your Makita LS1013 sliding compound miter saw, carefully verify all components are present. The standard package should include the LS1013 saw itself, a 12-inch TCT saw blade (typically with 60 teeth for fine cuts), and a blade wrench for safe blade changes. A dust bag is included for basic dust collection, though users often supplement this with shop vacuums.
Additionally, you should find a vertical clamp to securely hold workpieces, and a miter gauge for accurate angle adjustments. The package also contains an instruction manual – this document – detailing operation and safety. Some regional packages may include a hex wrench set for minor adjustments. Online discussions confirm the absence of a battery or charger, as the LS1013 is primarily a corded model.

Report any missing or damaged items to your retailer immediately.
Understanding the LS1013 Components
This section details the key parts of the Makita LS1013, including the blade assembly, base, fence, locking mechanisms, and integrated dust collection system for optimal performance.
Blade Assembly
The Makita LS1013’s blade assembly is a critical component, featuring a 10-inch blade designed for efficient and precise cutting. Understanding its features is paramount for safe and accurate operation. The blade is easily accessible for replacement, a process detailed later in this manual.
Proper blade selection is crucial; utilize blades specifically designed for the materials you intend to cut – wood, aluminum, or plastic. Regularly inspect the blade for sharpness and damage, replacing it when necessary to maintain cut quality and prevent potential hazards.
The blade guard automatically retracts during operation and returns to its protective position when the saw is not in use. Never disable or bypass the blade guard, as it’s a vital safety feature. Ensure the blade is securely tightened before each use, following the torque specifications outlined in the manual.
Base and Fence
The robust base of the Makita LS1013 provides stability during operation, crucial for accurate cuts. It features rubber feet to prevent sliding and minimize vibration. The fence, extending from the base, supports the workpiece and ensures square cuts.
Adjustments to the fence are straightforward, allowing for precise alignment and accommodating various material widths. Regularly check the fence for squareness using a combination square to maintain cutting accuracy. The fence also incorporates a material clamp to securely hold the workpiece in place, enhancing safety and precision.
The base can be rotated for specialized cuts, and its solid construction minimizes flex, even when working with larger materials. Inspect the base and fence periodically for any signs of damage or wear, addressing any issues promptly to maintain optimal performance.
Locking Mechanisms
The Makita LS1013 incorporates several locking mechanisms to ensure safe and precise operation. A primary locking lever secures the saw head at various miter and bevel angles, preventing unwanted movement during cutting. This lever must be fully engaged before powering on the saw.
Additionally, a slide lock prevents the sliding function from engaging accidentally, offering an extra layer of safety. The bevel lock firmly holds the saw head at the desired bevel angle, crucial for angled cuts. Regularly inspect these locking mechanisms for smooth operation and proper engagement.
Any stiffness or difficulty in engaging the locks should be addressed immediately. Proper functioning of these locks is paramount for both safety and achieving accurate, repeatable cuts. Failure to use the locking mechanisms correctly can lead to dangerous kickback or inaccurate results.
Dust Collection System
The Makita LS1013 features an integrated dust collection system designed to minimize airborne particles during operation. This system includes a dust bag attachment point and is compatible with vacuum hoses for enhanced dust removal. Efficient dust collection is vital for maintaining a clean work environment and protecting the operator’s respiratory health.
Regularly empty the dust bag to prevent clogging and maintain optimal suction. Ensure a secure connection between the vacuum hose (if used) and the saw’s dust port. Inspect the dust collection shroud for any damage or obstructions that could reduce its effectiveness.
Optimizing dust collection not only improves air quality but also enhances visibility of the cutting line. Proper maintenance of the dust collection system contributes to a safer and more productive work experience with the LS1013.

Operating Instructions
Before use, familiarize yourself with the saw’s controls and safety features. Proper operation involves powering on/off, adjusting angles, making cuts, and handling materials safely.
Powering On and Off
The Makita LS1013 features a straightforward power switch for convenient operation. To power on, locate the trigger switch, typically positioned for comfortable thumb access. Ensure the blade is fully retracted and not in contact with any material before activating the switch.
Depress the trigger switch firmly to initiate the motor. A safety lock-off mechanism may be present, requiring an additional action to prevent accidental activation. Release the trigger to immediately stop the blade. Never attempt to force the switch or modify its function.
Always allow the blade to come to a complete stop before lifting the saw head or making adjustments. Disconnect the power source (battery or cord) when performing maintenance, changing the blade, or leaving the saw unattended. Proper power cycling extends the life of the motor and ensures safe operation.
Be mindful of the power cord’s location to avoid accidental damage or tripping hazards.
Adjusting the Bevel Angle
The Makita LS1013 allows for bevel cuts, enabling angled slices for various projects. To adjust the bevel angle, locate the bevel lock lever, usually positioned on the rear of the saw. Release the lever to unlock the bevel mechanism.
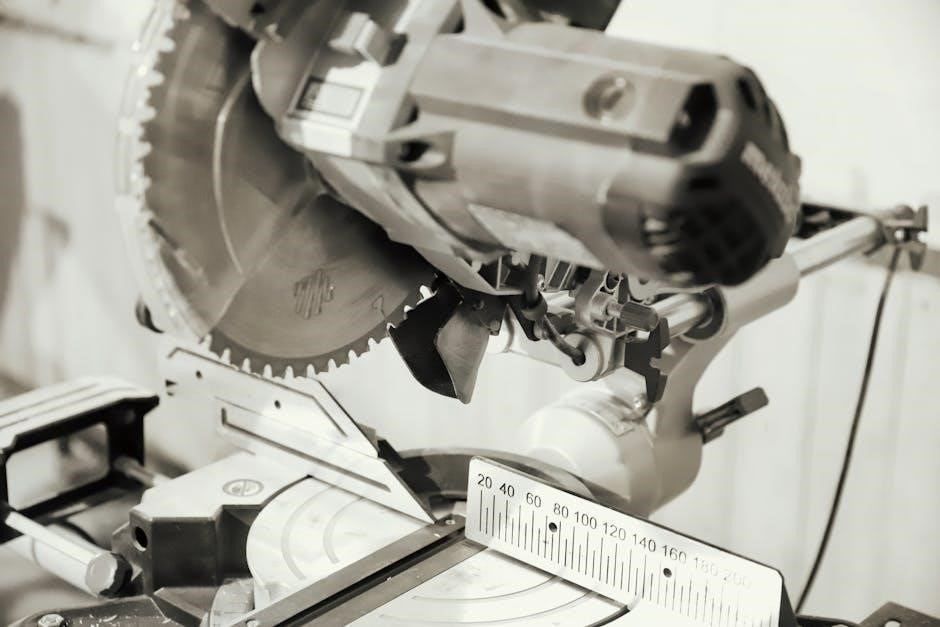
Carefully tilt the saw head to the desired angle, referencing the bevel scale for accuracy. The scale typically displays angles from 0 to 45 degrees in both directions. Once the desired angle is set, firmly re-engage the bevel lock lever to secure the position.
Always double-check the angle before making a cut, as an improperly locked bevel can lead to inaccurate results. Ensure the material is firmly supported against the fence during bevel cuts. Regular inspection of the bevel lock mechanism is recommended to maintain precision.
Avoid forcing the bevel adjustment; smooth operation indicates proper functionality.
Adjusting the Miter Angle
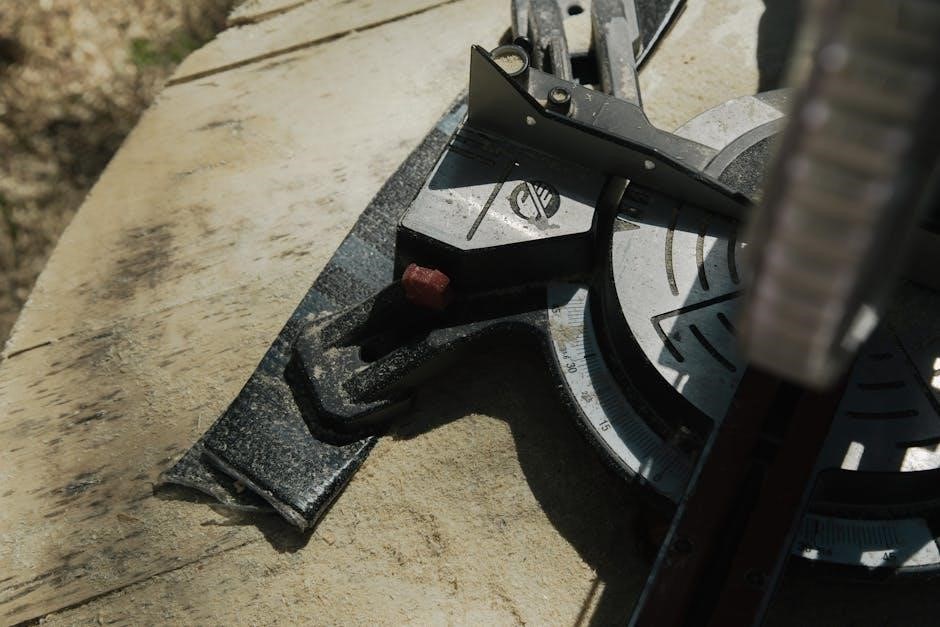
The Makita LS1013’s miter angle adjustment allows for crosscuts at various angles. Locate the miter lock lever, typically found on the side of the saw base. Disengage the lever to unlock the miter rotation.
Rotate the saw table to the desired miter angle, utilizing the miter scale for precise positioning. The scale usually indicates angles from 0 to 60 degrees left and right, with detents at common angles like 45 and 90 degrees. Once the angle is set, firmly secure it by re-engaging the miter lock lever.
Verify the angle before cutting, as an unlocked miter can cause inaccurate cuts. Ensure the workpiece is firmly against the fence during miter cuts. Regularly inspect the miter lock for proper function.
Smooth rotation indicates a healthy miter mechanism; avoid forcing the adjustment.
Making Accurate Cuts
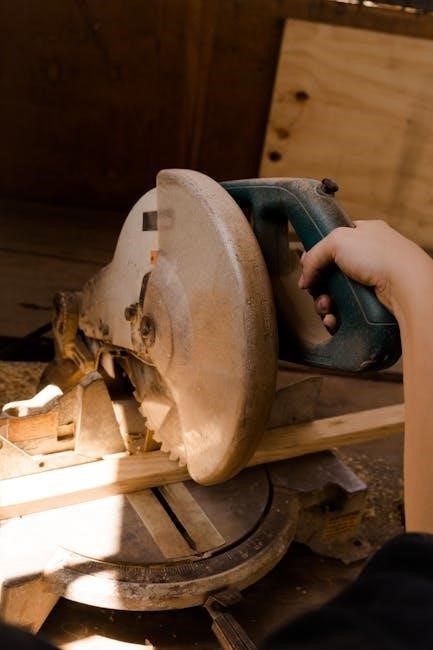
Achieving accurate cuts with the Makita LS1013 requires careful setup and technique. Always ensure the blade is sharp and properly installed. Securely clamp the workpiece against the fence, preventing any movement during the cutting process. Utilize the saw’s laser guide or shadow line for visual alignment with the cut line.
Maintain a firm grip on the saw handle and smoothly lower the blade through the material, avoiding excessive force or jerky motions. Allow the blade to reach full speed before initiating the cut. For wider stock, employ the sliding function, ensuring the saw remains stable throughout the entire cut.
Double-check all angle adjustments (miter and bevel) before each cut. Consistent practice and attention to detail are key to maximizing accuracy.
Regularly calibrate the laser guide for optimal precision.
Cutting Different Materials
The Makita LS1013 excels at cutting various materials, but blade selection is crucial. For wood, a fine-tooth blade delivers clean, splinter-free cuts. When cutting aluminum or plastic, utilize a specialized blade designed for non-ferrous materials to prevent melting or damage.
Adjust the cutting speed based on the material’s density. Softer materials require slower speeds, while harder materials benefit from increased speed. Always use appropriate safety gear, including eye protection and a dust mask, regardless of the material being cut.
Support longer pieces adequately to prevent bending or vibration during the cut. Avoid forcing the blade through tough materials; let the saw do the work.
Experiment with different blade types to optimize results for specific projects.
Maintenance and Troubleshooting
Regular maintenance ensures optimal performance and longevity of your LS1013. Addressing common issues, like blinking lights, and blade replacement are key to continued use.
Blade Replacement
Replacing the blade on your Makita LS1013 requires careful attention to safety and proper procedure. Always disconnect the power source – battery or cord – before beginning. Utilize appropriate safety gear, including gloves and eye protection.
First, locate and loosen the blade bolt using the provided wrench. Once loosened, remove the bolt, flange, and old blade. Clean the blade mounting area thoroughly.
Install the new blade, ensuring the correct rotation direction is aligned with the saw’s markings. Replace the flange and blade bolt, tightening securely but not excessively. A properly tightened blade is crucial for accurate cuts and safe operation. Double-check the bolt’s tightness before restoring power and resuming work. Refer to the full manual for detailed diagrams and torque specifications.
Cleaning the Saw
Regular cleaning is vital for maintaining the performance and longevity of your Makita LS1013. Always disconnect the power source before any cleaning procedure. Begin by removing any sawdust or debris from the blade guard, base, and fence using a brush or vacuum.
Pay close attention to the sliding rails, ensuring they are free of obstructions for smooth operation. A damp cloth can be used to wipe down the exterior surfaces, but avoid getting water into the motor or electrical components.
Empty the dust collection bag frequently to maximize suction efficiency. Inspect and clean the dust port to prevent clogging. Avoid using harsh chemicals or solvents, as they can damage the saw’s finish. Consistent cleaning prevents build-up and ensures accurate, safe cuts.
Lubrication
Proper lubrication is crucial for the smooth and efficient operation of your Makita LS1013 sliding compound miter saw. Focus lubrication efforts on the sliding rails, applying a small amount of lithium-based grease to ensure effortless movement. Avoid over-lubrication, as excess grease can attract dust and debris.
The bevel and miter locking mechanisms also benefit from occasional lubrication. Use a light machine oil to keep these components functioning correctly. Inspect the pivot points and apply lubricant as needed.
Do not lubricate the blade itself or the motor. Regular lubrication minimizes friction, reduces wear and tear, and extends the lifespan of your saw, maintaining its precision and performance over time. Always disconnect the power before lubricating.
Troubleshooting Common Issues (Red/Green Blinking Lights)
A red and green blinking light on your Makita LS1013 often indicates a battery or charger issue. First, ensure the battery is properly seated in the charger. If the blinking persists, try a different battery to rule out a faulty power source. A consistently blinking red light may signal a defective battery requiring replacement.
A green blinking light, coupled with red, can indicate a communication error between the battery and charger. Try cleaning the battery terminals with a dry cloth. If the problem continues, the charger itself might be malfunctioning and require servicing or replacement;
Consult the Makita support website for specific blink code definitions related to your model.
Addressing Cutting Inaccuracies
If your Makita LS1013 isn’t cutting accurately, several factors could be at play. Begin by verifying the squareness of the fence and base; adjustments may be needed. Ensure the blade is securely tightened and in good condition – a dull or damaged blade will produce inaccurate cuts.
Double-check the miter and bevel angle settings, confirming they align with your desired cut. When cutting larger pieces, support the material adequately to prevent deflection. Examine the sliding rails for any obstructions or debris that might hinder smooth movement.
Calibrate the saw using a known accurate reference point.

Advanced Features & Techniques
Explore the LS1013’s sliding function for wider stock, optimize dust collection for a cleaner workspace, and maximize battery life for extended runtime.
Using the Sliding Function
The Makita LS1013’s sliding rails significantly expand its cutting capacity, allowing you to handle wider materials than a non-sliding miter saw. Before utilizing this feature, ensure the workpiece is securely clamped against the fence and the blade is raised to its full height.
Unlock the sliding mechanism by disengaging any locking levers. Gently slide the saw head forward, maintaining a firm grip, and align the blade with your desired cut line. Double-check your measurements and ensure the blade won’t bind during the cut. Engage the sliding lock once the position is set for added stability.
Remember to account for the blade’s kerf (width) when marking your cut lines. Smoothly operate the power trigger and allow the blade to reach full speed before initiating the cut. Avoid forcing the saw through the material; let the blade do the work. After the cut, return the saw head to its original position and re-engage the sliding lock.

Optimizing Dust Collection
Effective dust collection is crucial for maintaining a clean workspace and ensuring optimal visibility while operating the Makita LS1013. This saw features a dedicated dust port compatible with standard vacuum hoses. Connect a shop vacuum with sufficient suction to the port before beginning any cutting operation.
Ensure a tight seal between the hose and the dust port to prevent dust leakage. Regularly inspect and empty the vacuum’s dust bag or canister to maintain consistent suction power. For enhanced dust control, consider using a Makita-branded dust bag designed specifically for this model.
Periodically clean the saw’s internal dust collection channels to prevent blockages. A buildup of sawdust can reduce suction efficiency and potentially damage the saw’s components. Proper dust collection not only improves your working environment but also extends the life of your Makita LS1013.
Maximizing Battery Life (If Applicable)
While the Makita LS1013 is primarily a corded saw, some variations or accessory features might utilize battery power. If your model includes battery-powered components, following these guidelines will maximize their lifespan and performance.
Always use genuine Makita batteries and chargers. Non-genuine accessories can damage the tool and void the warranty. Avoid completely discharging batteries, as this can reduce their capacity over time. Instead, recharge them when the battery indicator shows a low charge.
Store batteries in a cool, dry place, away from direct sunlight and extreme temperatures. Prolonged storage should be with the battery partially charged. Regularly inspect batteries for any signs of damage, such as cracks or swelling. Proper battery maintenance ensures reliable operation and extends the overall usability of your Makita LS1013.

Comparison with Other Makita Models
This section contrasts the LS1013 with other Makita sliding compound miter saws, highlighting key differences in features, power, and intended applications for informed decisions.
LS1013 vs. Other Sliding Compound Miter Saws
Compared to other Makita sliding compound miter saws, the LS1013 occupies a sweet spot, offering a balance of power, precision, and portability. Models like the LS1040 boast larger cutting capacities, ideal for substantial trim work or framing, but at the cost of increased weight and bulk. Conversely, the LS1012 is more compact and lightweight, sacrificing some cutting depth and miter range.
The LS1013 distinguishes itself with its direct-drive motor, providing consistent power and reduced noise levels compared to belt-driven alternatives. Its 10-inch blade allows for versatile cutting of various materials, while the sliding rails enable wider crosscuts. Users often note its accuracy and ease of use, making it suitable for both professionals and DIY enthusiasts. However, some may find the dust collection system less effective than those found on higher-end models.
Ultimately, the best choice depends on individual needs and project requirements. The LS1013 excels as an all-around performer, while specialized models cater to specific demands.
Makita vs. Bosch/Dewalt Alternatives
When comparing the Makita LS1013 to alternatives from Bosch and Dewalt, several key differences emerge; Bosch models often prioritize features like variable speed control and advanced dust management systems, appealing to users who demand maximum precision and cleanliness. Dewalt saws are frequently lauded for their rugged durability and powerful motors, making them well-suited for demanding jobsite conditions.
However, the LS1013 consistently receives praise for its balance of performance, accuracy, and value. Many users find its direct-drive motor quieter and smoother than comparable Bosch or Dewalt saws. While the dust collection might not be as robust as some competitors, it’s generally sufficient for most applications.
Ultimately, brand preference often plays a role, particularly if a user is already invested in a specific tool ecosystem. The LS1013 remains a strong contender, offering a reliable and capable solution for a wide range of cutting tasks.

Warranty Information
Makita offers a warranty for the LS1013, covering manufacturing defects. Registration is crucial for claim eligibility, and support is readily available through Makita’s official channels.
Registering Your LS1013
Registering your Makita LS1013 sliding compound miter saw is a vital step to ensure your warranty is valid and to streamline any potential service requests. This process typically involves visiting the official Makita USA website and locating the warranty registration section. You will need to provide key information, including the model number (LS1013), the serial number found on the saw’s nameplate, and your purchase date and location.
Creating a Makita account is often required for registration, allowing you to manage your tools and warranty information online. Keep a record of your registration confirmation for your records. Prompt registration demonstrates proof of purchase and activates the full benefits of your Makita warranty, protecting your investment and providing peace of mind. Failure to register may complicate any future warranty claims.
The registration process is quick and easy, and it’s a proactive measure that can save you time and hassle should you ever need to utilize your warranty.
Contacting Makita Support
Should you encounter any issues with your Makita LS1013 sliding compound miter saw that aren’t addressed in this manual, or require assistance with warranty claims, contacting Makita Support is crucial. You can reach them through several channels, including their official website, which features a comprehensive FAQ section and online support form.
For direct assistance, Makita provides a toll-free customer service phone number, allowing you to speak with a knowledgeable representative. Their website also lists authorized service centers located throughout the country, where you can bring your saw for professional repair and maintenance. When contacting support, have your model number (LS1013) and serial number readily available.
Be prepared to describe the issue in detail, and if possible, provide photos or videos to aid in diagnosis. Makita’s support team is dedicated to ensuring customer satisfaction and resolving any concerns you may have regarding your LS1013.